mkfs.xfs: cannot open /dev/[device]: Device or resource busy

If you hit this error trying to format a partition after you have installed a new disk in your server:

~# mkfs -t xfs -f -i size=2048 /dev/sdav2
mkfs.xfs: cannot open /dev/sdav2: Device or resource busy

Maybe you have multipath enabled and the new device has been detected. Run this command to see if multipath has detected it.

~# multipath -ll /dev/sdav
2796a30585a4b6e45 dm-12 ,
size=2.2T features='0' hwhandler='0' wp=rw
|-+- policy='service-time 0' prio=0 status=active
| `- #:#:#:# sdav 66:48  active undef running

then to fix it, remove from multipath:

~# multipath -f /dev/sdav

And finally you can format it without any problem:

~# mkfs -t xfs -f -i size=2048 /dev/sdav2
meta-data=/dev/device            isize=2048   agcount=4, agsize=3277258 blks
         =                       sectsz=512   attr=2
data     =                       bsize=4096   blocks=13109032, imaxpct=25
         =                       sunit=0      swidth=0 blks
naming   =version 2              bsize=4096   ascii-ci=0
log      =internal log           bsize=4096   blocks=6400, version=2
         =                       sectsz=512   sunit=0 blks, lazy-count=1
realtime =none                   extsz=4096   blocks=0, rtextents=0

CEPH: SATA and SSD pools on the same server without editing crushmap

I had some free slots in two on my ceph nodes and I used them to set a new SSD only pool. Because the ssd OSDs are sharing the server with an existing SATA pool we have to do some additional steps. There are some good posts out there that explain how to set up two pools sharing the same server, but you have to edit manually the ceph crushmap. Although it’s not very difficult to do it in that way I achieve the same goal setting the crush location parameter for those OSDs. I’ve tested it in Hammer release.

First create a new root bucket for the ssd pool. This bucket will be used to set the ssd pool location using a crush rule.

ceph osd crush add-bucket ssds root

We already have some servers with SATA OSDs in production, but we have to add two new host buckets for the faked hostnames that we are going to use to set the ssd OSDs.

ceph osd crush add-bucket ceph-node1-ssd  host
ceph osd crush add-bucket ceph-node2-ssd  host

Move the host buckets to the ssds root:

ceph osd crush move ceph-node1-ssd root=ssds
ceph osd crush move ceph-node2-ssd root=ssds

In the ceph configuration file (ceph.conf) set the crush location for the SSD OSDs. This is necessary because the default location is always the hostname obtained with the command hostname -s

[osd.35]
host =  ceph-node1
osd_journal = /dev/disk/by-id/ata-INTEL_SSDSC2BB016T6_BTWA543204R11P6KGN-part1
crush_location =  root=ssds host=ceph-node1-ssd

You can check the location of the osd running this command:

$ ceph-crush-location --id 35 --type osd
 root=ssds host=ceph-node1-ssd

For each new ssd OSD move the osd to ssds root:

ceph osd crush add 35 1.5 root=ssds
ceph osd crush set osd.35 1.5 root=ssds host=ceph-node1-ssd

Create a new SSD pool:

ceph osd pool create ssdpool 128 128

Crate a crush rule in the ssds root:

ceph osd crush rule create-simple ssdpool ssds host

Finally assign the new rule to the ssdpool:

$ ceph osd pool set ssdpool crush_ruleset 4
 set pool 5 crush_ruleset to 4

Got! Now, we have a new only SSD pool:

$ ceph osd tree
ID  WEIGHT   TYPE NAME                       UP/DOWN REWEIGHT PRIMARY-AFFINITY 
-25  3.00000 root ssds                                                    
-26  1.50000     host ceph-node1-ssd                                          
 35  1.50000         osd.35                       up  1.00000          1.00000 
-27  1.50000     host ceph-node2-ssd                                          
 36  1.50000         osd.36                       up  1.00000          1.00000 
-21 48.22978 root sata                                                    
-24  6.50995     host ceph-node1                                              
  1  0.92999         osd.1                        up  1.00000          1.00000 
  5  0.92999         osd.5                        up  1.00000          1.00000 
 16  0.92999         osd.16                       up  1.00000          1.00000 
 17  0.92999         osd.17                       up  1.00000          1.00000 
 18  0.92999         osd.18                       up  1.00000          1.00000 
 19  0.92999         osd.19                       up  1.00000          1.00000 
 20  0.92999         osd.20                       up  1.00000          1.00000 
-22  6.50995     host ceph-node2                                              
 21  0.92999         osd.21                       up  1.00000          1.00000 
 22  0.92999         osd.22                       up  1.00000          1.00000 
 23  0.92999         osd.23                       up  1.00000          1.00000 
 24  0.92999         osd.24                       up  1.00000          1.00000 
 25  0.92999         osd.25                       up  1.00000          1.00000 
 26  0.92999         osd.26                       up  1.00000          1.00000 
 27  0.92999         osd.27                       up  1.00000          1.00000 
 -7 13.29996     host ceph-node3                                              
  0  1.89999         osd.0                        up  1.00000          1.00000 
  6  1.89999         osd.6                        up  1.00000          1.00000 
  9  1.89999         osd.9                        up  1.00000          1.00000 
 11  1.89999         osd.11                       up  1.00000          1.00000 
 14  1.89999         osd.14                       up  1.00000          1.00000 
 15  1.89999         osd.15                       up  1.00000          1.00000 
  2  1.89999         osd.2                        up  1.00000          1.00000 
-20  6.50995     host ceph-node4                                              
 28  0.92999         osd.28                       up  1.00000          1.00000 
 29  0.92999         osd.29                       up  1.00000          1.00000 
 30  0.92999         osd.30                       up  1.00000          1.00000 
 31  0.92999         osd.31                       up  1.00000          1.00000 
 32  0.92999         osd.32                       up  1.00000          1.00000 
 33  0.92999         osd.33                       up  1.00000          1.00000 
 34  0.92999         osd.34                       up  1.00000          1.00000 
-14 15.39998     host ceph-node5                                              
  3  2.20000         osd.3                        up  1.00000          1.00000 
  4  2.20000         osd.4                        up  1.00000          1.00000 
  7  2.20000         osd.7                        up  1.00000          1.00000 
  8  2.20000         osd.8                        up  1.00000          1.00000 
 10  2.20000         osd.10                       up  1.00000          1.00000 
 12  2.20000         osd.12                       up  1.00000          1.00000 
 13  2.20000         osd.13                       up  1.00000          1.00000 
[...]

Changing osd configuration without restarting

If you want to change some settings in your OSDs but you don’t want to reboot them this is the way to do it. There are two ways to change the settings on the osd:

If you are in a server where a specific OSD is running on like the OSD.3 in the example, you can use ceph daemon command to get and set settings on the OSD:

# ceph daemon osd.3 config get osd_deep_scrub_interval
{
    "osd_deep_scrub_interval": "604800"
}
 ceph daemon osd.3 config set osd_deep_scrub_interval 4838400
{
"success": "osd_deep_scrub_interval = '4.8384e+06' "
}

If you want to change settings in remote OSDs or you want to change all OSDs at once you can use injectargs:

ceph tell osd.4 injectargs '--osd-deep-scrub-interval 4838400'
osd_deep_scrub_interval = '4.8384e+06'

To change all of them:

ceph tell osd.* injectargs '--osd-deep-scrub-interval 4838400'

Radosgw list current created users

I haven’t found in the Ceph Object Gateway docs a command to get the radosgw active users, so I was looking for it and finally inspecting the objects inside the rados gateway pools, I found the way to get the list:

# rados -p .users.uid ls | grep -v buckets
user1
user2
user3

And another way using radosgw-admin command (recently discovered):

# radosgw-admin metadata list user
[
    "user1",
    "user2",
    "user3"

]
# radosgw-admin user info --uid=user1
{
    "user_id": "user1",
    "display_name": "User 1",
    "email": "",
    "suspended": 0,
    "max_buckets": 1000,
    "auid": 0,
    "subusers": [],
    "keys": [],
    "swift_keys": [],
    "caps": [],
    "op_mask": "read, write, delete",
    "default_placement": "",
    "placement_tags": [],
    "bucket_quota": {
        "enabled": false,
        "max_size_kb": -1,
        "max_objects": -1
    },
    "user_quota": {
        "enabled": false,
        "max_size_kb": -1,
        "max_objects": -1
    },
    "temp_url_keys": []
}

Calamari on Ubuntu 14.04 with Firefly

Calamari is great console developed by the Inktank Team, but the process, building it, was a very difficult and laborious process. The good news is that now they are building binary packages and put them in a repository that make the calamari installation a lot easier. Although, the packages are in a dev stage the console is very usable. The repository can be found here:

http://download.ceph.com/calamari/

To set the repository run the following command:

echo "deb http://download.ceph.com/calamari/devel/trusty/ trusty main" > /etc/apt/sources.list.d/calamari.list

Then get the repository key:

wget -q -O- 'https://ceph.com/git/?p=ceph.git;a=blob_plain;f=keys/autobuild.asc' | sudo apt-key add -

And finally install the packages:

$ sudo apt-get install calamari-server calamari-clients

Run initialize

$ sudo calamari-ctl initialize
[INFO] Loading configuration..
[INFO] Starting/enabling salt...
[INFO] Starting/enabling postgres...
[INFO] Updating database...
[INFO] Initializing web interface...
[INFO] Starting/enabling services...
[INFO] Updating already connected nodes.
[INFO] Restarting services...
[INFO] Complete.

If you want to go through the process of building the packages for yourself, you can do it with the help of these guides:

http://ceph.com/calamari/docs/operations/server_install.html
https://ceph.com/category/calamari/

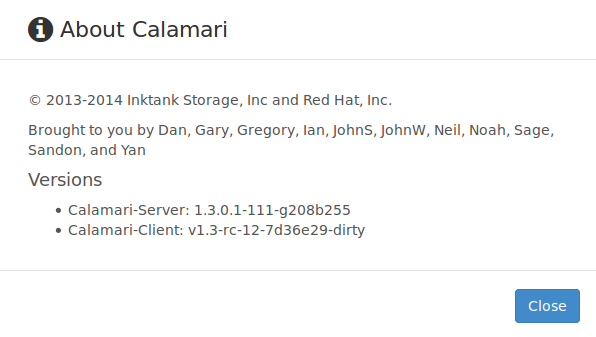
In fact, I have to built the calamari-server package from the sources because I couldn’t make it work in my server, the initialize process always finished with errors. I guess there was some bug in the binary package that was fixed in the sources. To save time to you, if you want to install the package I built, you can get it here: calamari-server_1.3.0.1-111-g208b255_amd64.deb

I the case that you built the packages from the sources or used the package I post here you should check this post too.

Calamari needs saltstack to run, but I faced issues with the last versions of saltstack, I guess calamari is only compatible with the branch 2014-7 of saltstack. To install this version you can add this repository:

echo "deb http://ppa.launchpad.net/saltstack/salt2014-7/ubuntu trusty main" > /etc/apt/sources.list.d/saltstack-salt-trusty.list

Install de repository key:

gpg --keyserver keyserver.ubuntu.com --recv-key 0E27C0A6 && gpg -a --export 0E27C0A6 | sudo apt-key add -

Or simply run this command to get the repository working on your machine:

$ sudo add-apt-repository ppa:saltstack/salt2014-7

Now you can install the salt-master and salt-minion if needed:

$ sudo apt-get install salt-master

You have to be sure that in your ceph nodes you have the same salt version that you have in your master:

$ sudo dpkg -l | grep salt
ii  salt-common                          2014.7.5+ds-1ubuntu1             all          shared libraries that salt requires for all packages
ii  salt-master                          2014.7.5+ds-1ubuntu1             all          remote manager to administer servers via salt
ii  salt-minion                          2014.7.5+ds-1ubuntu1             all          client package for salt, the distributed remote execution system

You can check if the clamari services are working Ok:

$ sudo supervisorctl status
carbon-cache                     RUNNING    pid 1088, uptime 23:19:02
cthulhu                          RUNNING    pid 27734, uptime 0:15:00

If something is wrong you should check the /var/log/calamri directory
about_calamari