Resize vps disk in an automated way

This is the commands I run to resize automatically the VPS disks when I have resized the disk through Proxmox interface.

#!/bin/bash

# This is only needed if you use GPT type tables
echo "Fix" | /usr/local/sbin/parted  ---pretend-input-tty /dev/sdb print
# Resize partition 1 using all the space
/usr/local/sbin/parted /dev/sdb resizepart 1 100%
#  I use LVM so the physical volume must be resized first
pvresize /dev/sdb1
# Resize the logical volume using all space available
lvresize /dev/vgdata/home -l +100%FREE
# Finally notify file system to use all the space
resize2fs /dev/vgdata/home

Note: I use parted 3.2, if your distribution comes with an older one uninstall it and install it from sources

venet access like in Linux Containers (LXC)

I’ve been using OpenVZ containers in Proxmox for a while, and after upgrading to Proxmox 4 OpenVZ has been removed in favor of LXC containers. Although LXC containers have a lot of great features, the way they access to the network is not very good if you have untrusted users using them, because the network device in the container is attached directly to the bridge.

I liked a lot the venet devices in OpenVZ because with this devices the container has only access to the layer 3 of the network. In this post I tried to get venet like access with LXC containers, for that I used ebtables rules to limit this access.

In my case I created a new bridge (vmbr02) in a separate vlan (550) for the containers. The idea is that the proxmox node is going to be the gateway in layer 2 and layer 3 for the container and the MAC of the container is going to be masqueraded with the MAC of the bridge in the proxmox node. Because I have already a gateway configured in the proxmox node I’m going to create a new route table with the configuration of this network.

First we add the IP (10.10.10.10) to the new bridge in the proxmox node. This IP will be the gateway in the container.

sudo ip addr add 10.10.10.10/32 dev vmbr02v550 
sudo ip route add 10.10.10.0/24 dev vmbr02v550 src 10.10.10.10

Create the new route table for the new network in vlan 550

sudo echo "550 vlan550" >> /etc/iproute2/rt_tables

Populate the new table with the real gateway of this network (10.10.10.1)

sudo ip route add throw 10.10.10.0/24 table 550
sudo ip route add  default via 10.10.10.1 table 550

Add a rule for the traffic comming up from the bridge lookup the table 550:

sudo ip rule add from 31.193.227.0/24 iif vmbr02v550 lookup vlan550

Enable ip forwarding because the proxmox node will be the router for the LXC container. Because we only want ip forwarding in the bridge interface we can enable it only for this interface:

sudo systectl -w net.ipv4.conf.vmbr02v550.forwarding= 1

or

echo 1 > /proc/sys/net/ipv4/conf/vmbr02v550/forwarding

and to be permanent between reboots:

echo "net.ipv4.conf.vmbr02v550.forwarding= 1" >> /etc/sysctl.conf

I added this iptables rule because I’dont want the server be accessed with this IP address, this IP is going to use only to provide networking to the containers.

iptables -A INPUT -d 10.10.10.10 -j REJECT

At this point we have to have the LXC container created. In the following example we see a LXC with id 150:

$ sudo pct list
VMID       Status     Lock         Name                
150        stopped                 pruebas-lxc         

The bridge vmbr02v550 has one port connected to the physical network (bond0.550) and one virtual port connected to the container (veth150i1). Note that the container must be running to see the virtual port up:

$ sudo brctl show vmbr02v550
bridge name	bridge id		STP enabled	interfaces
vmbr02v550		8000.002590911cee	no		bond0.550
							veth150i1

Now it’s time to put some ebtables rules to limit the traffic forwarded in the bridge, these are general rules used for all the containers:

# ebtables rules in the table filter and chain forward
ebtables -A FORWARD -o veth+ --pkttype-type multicast -j DROP #1
ebtables -A FORWARD -i veth+ --pkttype-type multicast -j DROP #2
ebtables -A FORWARD -o veth+ --pkttype-type broadcast -j DROP #3
ebtables -A FORWARD -i veth+ --pkttype-type broadcast -j DROP #4
ebtables -A FORWARD -p IPv4 -i veth+ -o bond0.550 --ip-dst 10.10.10.0/24 -j ACCEPT #5
ebtables -A FORWARD -p IPv4 -i bond0.550 -o veth+ --ip-dst 10.10.10.0/24 -j ACCEPT #6
ebtables -A FORWARD -o veth+ -j DROP #6
ebtables -A FORWARD -i veth+ -j DROP #7

In this rules we use the expression veth+ to refer to all LXC virtual ports that can be connected to the bridge. The short explanation of each rule is the following:

  • #1 and #2 => Stop all multicast layer 3 packets delivered from an to the LXC virtual ports
  • #2 and #3 => Stop all broadcast layer 3 packets delivered from and to the LXC virtual ports
  • #5 and #6 => Only allow forwarding if the source IP or the destination IP  is in the LXC containers network.
  • #6 and #7 => Drop all packets that don’t met the above rules. We don’t want any packets from layer 2.

We need some ebtables rules in the nat table, but in this case these rules are set for each container. For this example we suppose the following:

  • Proxmox node MAC address: 0:25:90:91:1c:ee
  • LXC real MAC address: 66:36:61:62:32:31
  • LXC IP address: 10.10.10.11
#Ebtables rule to translate the packets that must be delivered to the LXC container IP to its real MAC
ebtables -t nat -A PREROUTING -p IPv4 -d 0:25:90:91:1c:ee -i bond0.550 --ip-dst 10.10.10.11 -j dnat --to-dst 66:36:61:62:32:31 --dnat-target ACCEPT
#Ebtables rule to reply to the ARP requests looking for the MAC of the LXC container with the MAC of the host:
ebtables -t nat -A PREROUTING -i bond0.550 -p ARP --arp-op Request --arp-ip-dst 10.10.10.11 -j arpreply --arpreply-mac 0:25:90:91:1c:ee
# I preffer the ebtables rule, but the above can be addressed too with the following arp command:
# arp -i vmbr02v550 -Ds 10.10.10.11 vmbr02v550 pub
#Ebtables rule to mask the LXC container MAC with the MAC of the host
ebtables -t nat -A POSTROUTING -s 66:36:61:62:32:31 -o bond0.550 -j snat --to-src 0:25:90:91:1c:ee --snat-arp --snat-target ACCEPT

And we are done! with this configuration the LXC container, although connected directly to the linux bridge, it has a limited access to the network.
OpenStack: ssh timeout with GRE tunnels

I configured my OpenStack installation and all went Ok. I used the Open vSwitch plugin with GRE tunnels and although I had ping connectivity, when I try to connect to instances through ssh I got a time out. The problem seemed to be in the tunnel MTU size. I had to lower the mtu size on instances to prevent packet fragmentation over GRE tunnel.

Edit /etc/neutron/dhcp_agent.ini file, add this line:

# Override the default dnsmasq settings with this file
dnsmasq_config_file = /etc/neutron/dnsmasq/dnsmasq-neutron.conf


Create file  /etc/neutron/dnsmasq/dnsmasq-neutron.conf and add these values:

dhcp-option-force=26,1400


Finally restart neutron server

# service neutron-server restart


References:

http://docs.openstack.org/admin-guide-cloud/content/openvswitch_plugin.html

testing KVM disk limits

In this post, I am testing the IO limits for disks provided by KVM. Why should you configure the disk limits in your guests? If you have your KVM disks in a shared storage back-end, as I have, and you cannot control the operations inside your VPS, you should establish some limits for each disk. You should monitor your VPS IOPS load if you don’t want to suffer an overhead in your storage caused by one VPS consuming a lot of IOPS. One VPS can saturate the storage degrading too much the performance of the rest of VPS. This can be, because your VPS are administered by very different people/customers or because you don’t want that an operation you perform in one VPS (that needs high IOPS) can cause IOWAIT to other VPS.

I am using ISCSI with 10 SAS drives configured as RAID10 for my back-end storage. In this test I configured in the virtio disk 200 IOPS and 10MBs for max bandwidth.

The first tool I used to test the limits is hdparm inside the VPS. With hdparm I tested the max bandwidth I could get from the storage, because this tool performs a sequential access. Without the limits I got 156MB and with the disk limited I got the expected 10MB.

hdparm with no limits on the disk:

# hdparm -t /dev/vda

/dev/vda:
 Timing buffered disk reads: 472 MB in  3.02 seconds = 156.36 MB/sec

hdparm with the disk limited to 10MBs:

# hdparm -t /dev/vda

/dev/vda:
Timing buffered disk reads: 32 MB in 3.02 seconds = 10.61 MB/sec

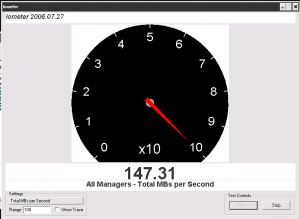
We can verify that the limits are perfectly applied. I used another tool, iometer, to verify the limits, because iometer has many configuration options to test them. To test the max bandwidth I configured a iometer test with a 256KB transfer request and 100% secuencial read access. With this iometer test I got a very similar value to hdparm with no limits on the disk:

iometer_nolimit

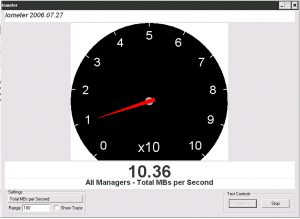
And with the disk limited to 10MBs I got again the same value:

iometer_limited

Ok, we know that the max bandwidth limits are applied perfectly well. I wanted to test too the KVM disk limited by IOPS instead of bandwidth. I configured the disk limited to 200IOPS and to test this limit I made a new iometer test, but this time with a 512B transfer rate and 100% sequential read access.

With the disk no limited and disk cache set to none I got about 1800 IOPS:

iops_nolimit

With the disk limited to 200 IOPS I got exactly 200IOPS avg:

iopslimit_limited

The IO limits are applied perfectly well for the VPS and another very important point: These limits are applied regardless of the disk cache mode used. If you use writeback cache mode, you can get many more IOPS in the guest than if you use cache mode set to none, but if you set IO limits on the disk you will get exactly the same IOPS in the guest. Ok, I use cache mode set to none for almost all VPS, so what limits should I configure to prevent abusive use of the storage?

Well, this is very dependant on the workload, but for me, the most painful IO operations I suffered, are from those that demand very sequential access, like creating a large tar.gz, making backups or the process of booting the VPS.

I want to limit the guest IOPS, but without affecting to much the performance of the guest. To archive this I configure 10MB for max bandwidth (reading and writing), 200IOPS for reading and 180IOPS for writing. After some time using these limits, I guess the VPS are hiting the bandwidth limit time to time. For example the VPS boot process lasts a bit longer, but after booting the VPS have an acceptable performance and the entire storage performance are better managed.

Proxmox KVM usb passthrough

Open KVM monitor for your KVM machine in Proxmox GUI or in the command line with the following command:

# qm monitor 168
Entering Qemu Monitor for VM 168 - type 'help' for help
qm> 

Show the usb devices info from your host machine:

qm> info usbhost
  Bus 4, Addr 2, Port 1, Speed 12 Mb/s
    Class 00: USB device 046b:ff10, Virtual Keyboard and Mouse
  Bus 6, Addr 2, Port 2, Speed 1.5 Mb/s
    Class 00: USB device 0624:0294, Dell 03R874
  Bus 2, Addr 3, Port 1, Speed 480 Mb/s
    Class 00: USB device 0930:6533, DataTraveler 2.0
  Auto filters:
    Bus *, Addr *, Port *, ID 0930:6533

According to device “USB device 0930:6533” in the example, add the device to guest machine:

qm> device_add usb-host,id=myusb,vendorid=0x0930,productid=0x6533

Verify that the new usb device is added in your guest:

qm> info usb
  Device 0.1, Port 1, Speed 12 Mb/s, Product QEMU USB Tablet
  Device 0.3, Port 2, Speed 12 Mb/s, Product QEMU USB Hub
  Device 0.4, Port 2.1, Speed 480 Mb/s, Product DataTraveler 2.0

After using it, remove usb device from your guest:

qm> device_del myusb

If you run the command again, you will see the usb device is gone from your guest:

qm> info usb
  Device 0.1, Port 1, Speed 12 Mb/s, Product QEMU USB Tablet
  Device 0.3, Port 2, Speed 12 Mb/s, Product QEMU USB Hub

This has been tested in Proxmox 3.0/957f0862


Notice: Undefined variable: wp_sh_class_name in /var/www/elkano.org/blog/wp-content/plugins/wp-syntaxhighlighter/wp-syntaxhighlighter.php on line 1002

Notice: Undefined variable: wp_sh_class_name in /var/www/elkano.org/blog/wp-content/plugins/wp-syntaxhighlighter/wp-syntaxhighlighter.php on line 1002

Warning: Use of undefined constant XML - assumed 'XML' (this will throw an Error in a future version of PHP) in /var/www/elkano.org/blog/wp-content/plugins/wp-syntaxhighlighter/wp-syntaxhighlighter.php on line 1048